Closed Thread Icon

Topic awaiting preservation: How do I touch up a photo with a glare on it? Pages that link to <a href="https://ozoneasylum.com/backlink?for=24177" title="Pages that link to Topic awaiting preservation: How do I touch up a photo with a glare on it?" rel="nofollow" >Topic awaiting preservation: How do I touch up a photo with a glare on it?\

 
Author Thread
AnnieJo
Obsessive-Compulsive (I) Inmate

From: Forsyth, GA
Insane since: Nov 2004

posted posted 11-25-2004 00:24

Hi,

I am a self taught adobe photoshop user (translation: not very experienced). My day job is artist and I have a rather poor copy of an art piece that I just completed. It is all I have to work with and the top third is very bright, almost washed out while the bottom two thirds is grayed. How can I mask and then blend the two parts together since they need to be adjusted separately? I use photoshop 5.5. Any suggestions?

AnnieJo

hyperbole
Paranoid (IV) Inmate

From: Madison, Indiana, USA
Insane since: Aug 2000

posted posted 11-25-2004 02:08

Hi AnnieJo,

Welcome to the Asylum.

The problem may not be as simple as you have described it, but I would start by using the rectangular marquee tool (the one in the top left corner of the Tools Pallette) to select the area you want to adjust. (You describe the two parts of the image as being top and bottom. This means you have a horizontal line somewhere on the image that marks the place where the image goes from being too light to being too gray. The marquee tool works as a rectangle that has horizontal and vertical sides. If the transition between the two halves is more complicated than this, you may need to use other selection tools for making a more complicated selection)

Let's say you select the bottom two thirds. Now use Selection->Feather to soften the edges of the selection. The amount you want to feather depends on the resolution of the image. If the image was scanned at 72dpi then three or four may be enough. If it was scanned at 300dpi then you might want to use 10 to 15. What this will do is make a selection with a soft edge so that the changes you make will not create a hard transition in the image.

Now use the Image->Adjust->Curves tool to adjust the contrast and brightness of the image. Make sure the Preview box is checked so that you can see the changes as you make changes to the curves. Play with the image for a while and learn how to make small adjustments to the curve.

Remember that you can always start over. also you can back out a number of changes you have made by using the History Pallette.

Remember to save any changes you make to a new file.

As warjournal always says "play.fiddle.learn"

-- not necessarily stoned... just beautiful.

AnnieJo
Nervous Wreck (II) Inmate

From: Forsyth, GA
Insane since: Nov 2004

posted posted 11-30-2004 21:39

warjournal,

Hi, I took your advice and used the lassoo tool to select the area with the glare. I feathered both selections at 10 and then 15 and you can see the area that was selected. I fiddled with the curve tool ad nauseum and my results were less than satisfactory, at best. I am sure it is an operator problem and not a program problem. Is it just a matter of hit and miss or are there some other things I can try? I am posting both the before and after on my website at www.visageportraits.com on the Workshop page in the hopes that you or someone will be open to giving me further advice and suggestions.

AnnieJo

DL-44
Maniac (V) Inmate

From: under the bed
Insane since: Feb 2000

posted posted 11-30-2004 21:57

It's definately a tricky thing to do - there is no gaurantee it can be salvaged.

One thing that is worth a try - the high pass filter.

Check out this thread, and this article that is linked to.

If you run it through the high-pass fileter, and then fade it to affect luminosity only, add a good curves adjustment, you just may make out alright.

Hard to say without seeing the image though. I stopped by the site - didn't see a 'workshop' page or anything resembling one though...


(Edited by DL-44 on 11-30-2004 23:08)

AnnieJo
Nervous Wreck (II) Inmate

From: Forsyth, GA
Insane since: Nov 2004

posted posted 11-30-2004 23:54

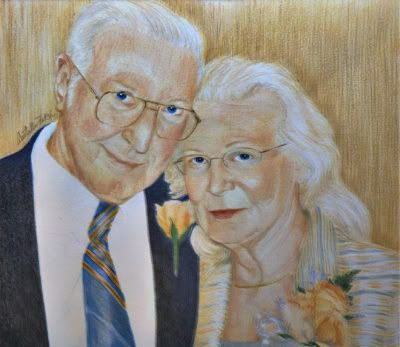
I might have been in the act of posting it. I just checked it and it is up. www.visageportraits.com. The before and after images are posted on the Workshop page.

Thanks

AnnieJo

DL-44
Maniac (V) Inmate

From: under the bed
Insane since: Feb 2000

posted posted 12-01-2004 01:04

Ah, yep - must have looked to soon

Ok, playing around with the method I mentioned above (which of course I took directly from that article), I came up with this, with about 2-3 minutes of playing -


Of course, not knowing the original piece, I have no way of getting the colors/saturation accurate, so obivously with a bit more tweaking this could be made much nicer.

Also, the hue/saturation adjustment is really handy - particularly when you use the drop down box to select certain color ranges and adjust their saturation/lightness directly. I usually do this on an adjustment layer, so that opacities and blending modes can be played with as well.

{{edit - also, judging by your other images, I'm guessing you're not worried about the mat, but if you were, that could be very easily recreated in photoshop if need be...


(Edited by DL-44 on 12-01-2004 01:06)

Tao
Paranoid (IV) Inmate

From: The Pool Of Life
Insane since: Nov 2003

posted posted 12-01-2004 02:08

I wanna play too

I really can't remember all the steps in progression, but basically I used feathered selections of about 10-30px using the Oval Tool (as the light source glare is oval) and ran levels and H+S each time duplicating the layer and moving or inverting the selection to graduate the next application of either H+S or Levels. Each time I tried to make only a gentle adjustment.
I wonder if that makes any sense

:::tao::: ::cell::
[edit]Oh yeah nearly forgot I also made a copy of the frame on a separate layer, evened out the colour\contrast on it using the method above. To see if that would give the effect of hiding glare a bit more.[/edit]

(Edited by Tao on 12-01-2004 02:12)

AnnieJo
Nervous Wreck (II) Inmate

From: Forsyth, GA
Insane since: Nov 2004

posted posted 12-01-2004 05:26

Wow,

I have been playing too. I posted my latest on my website but it doesn't look as nice as either of these! I love this site! Where have you been all my life?

AnnieJo

UnknownComic
Maniac (V) Inmate

From: 2 steps away from a los angeles curb
Insane since: Nov 2003

posted posted 12-01-2004 08:56

Annie you have the two necessary pieces on your page.

Put the bottom image on the lower layer, put the brighter one above it and set its blend to multiply and adjust the transparency. I set it to 60% and Voila;


______________
Is This Thing On?

Webbing; the stuff that sticks to your face.

warjournal
Maniac (V) Mad Scientist

From:
Insane since: Aug 2000

posted posted 12-01-2004 16:20

Bah! UC beat me to the Multiply punch.
I did Multiply for luminosity and it was pretty much the same result.

I tried a few other things, but only marginal improvement.
Mine was somewhere between Tao's and UC's.

With some copy merged and some layer masking, it was almost passable.

When I first saw the original, I honestly thought it was a filter fest.
I was like, there's no way that is a straight-up photo - someone filter fested it.

And, of course, I highly recommend that tutorial on High Pass.
I wish there were more authors like that.
You know, nitty-gritty types.

« BackwardsOnwards »

Show Forum Drop Down Menu