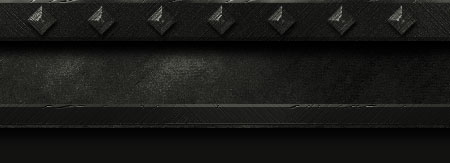
theGuest provided us with an excellent mini-tutorial on making a dark metal look:
quote:The main texture effect can be done numerous ways. It's really wide open to the artist's own vision.
1) Start off with the main texture. Use dark and light grey swatch colours. Run the CLOUDS filter, then to balance dark to light, run the LEVELS filter and move the Output sliders inward, starting with the white side. Stop at a good, even toned medium-dark grey. (Not too dark though)
2) Run the BRUSH STROKES>SPATTER filter on this clouds layer. This will produce a decent aged, scratched finish effect. If need be, and the effect is too strong, under the EDIT menu run the "FADE SPATTER" command. Dial in the amount of 'texture' you want.
TIP: Try applying some of the other filters under the "Artistic" & "Brush Stroke" filter menus. There are quite a few that can add good texture/grime to the metal. And remember, they can be applied partially too, not always just to the entire surface area. Duplicate the base layer you have and apply the other filter. Then use a Layer Mask to block out certain areas of the new, additional texture.
To get some variety... play with changing the Blend Mode when using the FADE command. It makes the texture look different.
3) Now add some NOISE to the texture. Just enough to "dirty up" the texture. Again if need be, run the FADE command to dial in the perfect amount of effect. And also play with Blend Modes here too.
*** These 3 steps need to be done to each separate part of your interface. Either that or to one entire layer, and then cut up that into the smaller pieces. Whichever way you care to do it.
4) For the edge highlights and bevel effect, simply add a new layer above the body parts. Then create a thin selection along the edge of the metal piece. Run the CLOUDS filter in the selection using black & white. Set the layer to Overlay, Softlight, or Difference.
If you're familiar with the LINE tool, that's an easier way to do this part. Once the edge line is drawn, run the Clouds filter on it.
5) To add dings and dents to the metal, add a new layer above all the iFace parts. The grab a 1 pixel brush and with white, paint over the spots you want the effect to be. After that, run the FILTER>STYLIZE>EMBOSS filter. Angle=90 Height=1 Amount=500. Set this layer to either Overlay or Softlight Mode. You can also use Hardlight but dial down the Opacity a little.
6) For special lighted areas, if there are any, just add a new top layer and paint with white over the desired areas, using a medium-large soft brush. Set the layer to Overlay or Softlight, and adjust with Opacity if need be. NOTE: the clouds filter used at the start will already be helping with this effect.
7) And last but not least... colour. Add a topmost Adjustment Layer to the palette. Click COLORIZE and dial in a dark army type green colour -- very earthy tone. Reduce Saturation until the green tint is barely visible.
Hope that gets you off in the right direction.
Good luck!